Thursday, October 25, 2012

Halloween Around the House

I actually have 2 different sets of Halloween decorations.  I have all the crazy Halloween party decorations and they fill up a whole shed full of plastic storage bins.  And then, I have the regular house decorations that take up two small, black and orange storage bins.  These are all the fragile, sentimental and cutesy decorations that don't usually go up for the party.

And now, my Halloween putz village is part of those decorations.
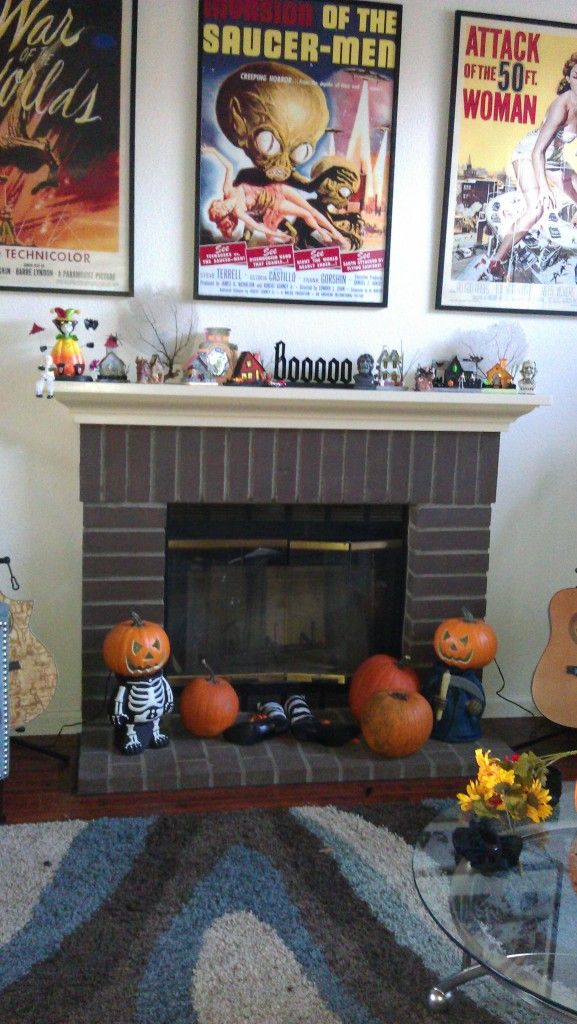

We have 2 fireplaces in our new house!  I always told Michael that I want to have a mantel someday, so we have a place to hang stockings.  And we ended up with 2 of them!

The one in the family room has the tv directly over it, so I really can't put much on it.  But the one in the living room is what you see right when you walk in the front door, so I cluttered it all up!  I have my putz village on it, which now includes the two little ceramic houses I found at Walmart about 5 years ago.  Down on the hearth, I put the smashed witch feet and legs and our 3 pumpkins that we'll carve on trick-or-treat night.  Also the two jack-o-lantern stands that Michael got for us this year with electric, blow mold jack-o-lanterns.  I love them!


I almost forgot about our American Gothic candle holder!  The tops of their heads hold candles, but I like them just as a figurine.  They're ceramic and all the black parts are flocked with a velvet-like substance.
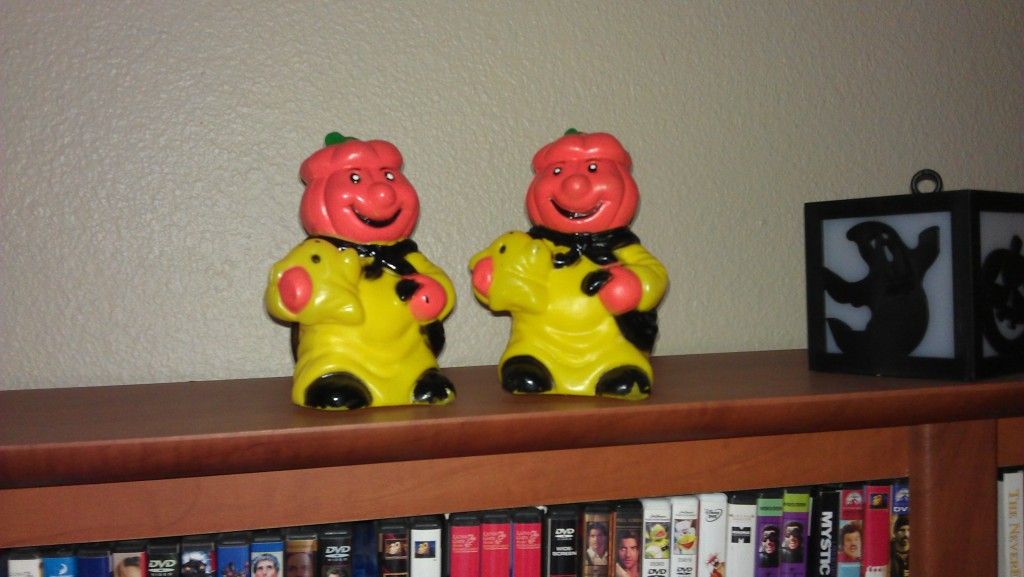

I got these goofy little guys at the 96 cent store.  I saw them last year, but couldn't bring myself to pay a whole 96 cents for them.  So, I got them for 48 cents this year!  Lol!  Isn't that ridiculous?  When I got home and was telling Michael the story, I realized how dumb it sounded.  And they came in a pack of 2.  Geez, I should go back and get the weird-looking ghosts too...


I love this trio.  They're on the mantel in the family room.  The skeleton nutcracker was sent to us last year from Michael's Mom.  The black cat is from when my Mom use to do piece work craft painting for a place called Robin's Nest back in the late 80's.  And the skeleton push puppet I found at Cost Plus about 11 years ago when I bought my condo.

It was so much fun to open up these storage bins and see these decorations!  They've been in storage for nearly 4 years, and I missed them all.  I'm very sentimental about holiday decorations and I can't wait to share them all with Korben.

He's already getting into it.  He loves the stuffed black kitty that I had in with everything else!


Thursday, April 19, 2012

Korben Bacon 4/5/2012

Korben decided that the day Michael's mom arrived in San Diego was the time for him to make his grand entrance. My water broke in the parking lot of the airport and after 28 hours of pretty easy labor he was born. I know 28 hours sounds like a really long time, but I spent most of the time sleeping thanks to my epidural! LOL! I had an amazing support team in the room with me the whole time. My Mom, Michael's Mom, Kelly and of course Michael were all so supportive and wonderful. Michael was the best push counter in the whole world and even took over counting for the midwife! I couldn't have asked for a better birth experience, and the healing process has been a piece of cake!

Korben 1 day old.

  We came home on Saturday, April 7th so he was able to celebrate his first Easter with his bow tie onesie and bunny pants.

Korben's First Easter

Thursday, March 22, 2012

Easter Couture for the Bibble!


I know he isn't technically due until April 10, which is 2 days after Easter. But with gestational diabetes it's very likely I won't be allowed to make it to 40 weeks. So, I'm quite sure he'll get to celebrate his first Easter this year. I found a very cute and easy newborn pants tutorial from Made by Rae. I also used her tutorial for making bunny knee pads, except that I used much smaller bunnies to fit the newborn pants.


The onesie is just a 0-3 month size white Gerber onesie with a bow tie applique. I told Michael that I plan to start a bow tie collection for Korben, and this will be his first!

I LOVE the Made by Rae newborn pants they sew up in literally about 15 minutes!  I already have two more pairs cut out, and I'm going to have to purchase her Big Butt Baby pants pattern.  Thanks Rae!

Wednesday, March 14, 2012

80's Nursing Gown


I finally sewed up McCall's 9437! I got this pattern quite a while ago from the lovely ladies at pattern rescue. Initially I just liked it. I love classic-style nightgowns, and there seemed to be lots of nightgown patterns available in the 80's.


This one is great because it buttons all the way down to below the waist in front, so it should make a perfect nursing gown. In fact I was just on the Baby Center boards this morning and people were saying the only good nursing gowns they have found were Laura Ashley! Well this pattern happens to be a Laura Ashley pattern that was issued back in 1985. :) 

Sunday, March 4, 2012

Sewing Tiny Things

And my final weekend project is a couple of wrap onesies for my little guy. I found a really great tutorial for a wrap onesie at Nefertari Creations. I was looking for something that wouldn't irritate his healing belly button when we brought him home. I love that her design criss-crosses, but still snaps at the crotch. She is very fortunate to have a cover stitch machine that gives a professional finish on the edge binding. But I found another great onesie tutorial from Naomi at Omi Creates that uses a very simple zig-zag stitch to create beautiful binding. So I used her technique on all the binding.


This first one was really just a trial run, so I used the selvage of the fabric to make the binding, since I didn't have any other knit. And I learned that I made the binding too narrow for the snaps to fit. But, it's still pretty cute! I really wanted to make him something with the fold over mitten cuffs and attached booties. Because I've been getting lots of good advice from experienced Mamas and I'm hearing that infants constantly kick off their socks and scratch themselves with their new finger nails. (Thanks Mama Kelly!) So, I altered the wrap onesie pattern to have longs legs with booties, and I used the sleeves with mitten cuffs that I found from yet another great baby tutorial created by Jessica at Running With Scissors. Not only she offers a great tutorial for sleep sacks, but she also had the genius idea to use old T-shirts for the solid knit portion of the pajamas and the binding!


This is what I plan to bring Korben home from the hospital in. I just have no idea if it'll fit him! LOL! So, I'll bring a couple other cute outfits that people have given him just in case...

Saturday, March 3, 2012

Robot Night Light!

Korben has a robot night light!


I really wanted Korben to have his own special night light whether he has his own room or not. I'll always remember my night light that I had when I was little and I used it for a very long time. I had this idea of making a night light with a plastic toy robot. But toy robots are kind of collector's items and are actually pretty pricey. Then, I thought, well I can't be the only one who thought of a robot lamp, so I started looking for robot lamps for sale. These were the best I could find:

But, for $98, I thought I could come up with something better. As I was cruising around eBay looking for plastic robot coin banks, or cheap toys that I could maybe salvage and repaint, I came across these robot measuring cups!


They're available in red or white and they're hollow plastic! I decided to get the white set because I wasn't sure what color I would paint the robot. I drilled holes in all the cups and made sure they fit on the Ikea lamp I found at a thrift store for $1.50. It looked pretty good even before the paint job.


I got the the plastic lamp shade and the tiny CFL bulb at Ikea and gave the robot a fire engine red paint job. His volt meter on the front is just a download from google images that I stuck on him and drowned in clear nail polish, so it looks like it's behind glass. It looks really cool when the light is on!

Stuffed Animal Hammock

We have a toy hammock!


It's nice to free up some space in our bedroom by going vertical with stuffed animal storage. I loosely followed the cute Stuffed Animal Net Tutorial from Christie at Lemon Squeezy. But I'm always looking for resourceful ways to save money on crafty projects, so I used some alternative materials. I bought a mesh bag from Dollar Tree and took it apart for the netting. And I used 2 1/2 packages of webbing from my rainbow luggage strap stash.


The bag was really easy to take apart. The stitching on the seam and the stitching on the drawstring casing just pulled right out. Then I cut it into a triangle and serged all the edges to add a little strength.


These luggage straps are one of my favorite 99 cent items. Whenever I see them at a dollar store I stock up. I've used them for sandbags, bag straps and now for the binding on a toy hammock. I just folded it in half and sandwiched the mesh inside- no pinning required! Good thing I still have a couple packages of this stuff left for future projects!

Up next on the list of nesting to-do's: a robot lamp!

Saturday, February 25, 2012

Finally sewing for the baby!


I've been seriously nesting! I'm 34 weeks and starting to realize that we're going to have a baby soon! We've had the kitchen/dining room/entry area and living room repainted. And we bought a new kitchen table and new living room furniture. Michael even approved an area rug! The house looks SO much better! Since we're staying in our little condo, we'll have the baby in our room with us. The plan is to have him sleep in the bassinet attachment of a pack n play and store his clothes in bins on the two lower shelves of his changing table. So I bought two of the Fabler Groda frog prince wall pockets from Ikea and hacked one of them into a diaper stacker. I looked all over different blogs for diaper stacker tutorials and I found some cute ones. But this one from Shannon over at Sew Beautiful was my very favorite. (And it's not just because she has such an awesome name!) I love that she made it gender neutral and the pockets on the front are a really cool detail. It also has the biggest capacity for diaper storage of any of the other diaper stacker tutorials I came across.

I harvested as much of the green stripes and dots as I could from the original wall pockets. Even though the wall pockets are over 4 feet tall, they really aren't made of much fabric. So I supplemented with the white cotton center from one of our old bed skirts. Now that we have a platform bed, our bed skirts have no purpose. But, we definitely have a use for a diaper stacker. So, all the diaper changing accessories and baby utensils will go in wall pockets and diapers will go in the matching stacker. Next, I need to figure out a net hammock for all his stuffed toys! He already has tons and after the baby shower tomorrow, I'm sure he'll have even more.

I've already done two loads of baby laundry and all those bins in his changing table are full of clothes, bibs and blankies! What a lucky boy he is already!